Welcome to the second installment of our “super-mini series” on how to get off that camera auto setting! We’re breaking down the 3 major camera settings into 3 simple posts to make each element comprehensive and easy to master. Now if this is your first stop in the series, I highly recommend checking out the previous post on Shutter Speed to start at square one. Getting a handle on motion is easy and an empowering foundation! If you’ve already become a motion pro, then great job!!! Let’s take it to the next step and talk about aperture.
Aperture is one of the most powerful tools in photography.
In my opinion, properly used aperture is what separates a good portrait from an amazing portrait, a cool landscape from a breathtaking shot. So what is this weird and magical term? Aperture is just a technical way to refer to depth of field. Depth of field is just a fancy way to say how much of the photograph will be in focus. Aperture settings are displayed with an F followed by a number, for example F1.4, but for now all you need to look at is the number value.
Don’t let me lose you on this, it doesn’t have to be complicated! Check out these 2 photos:
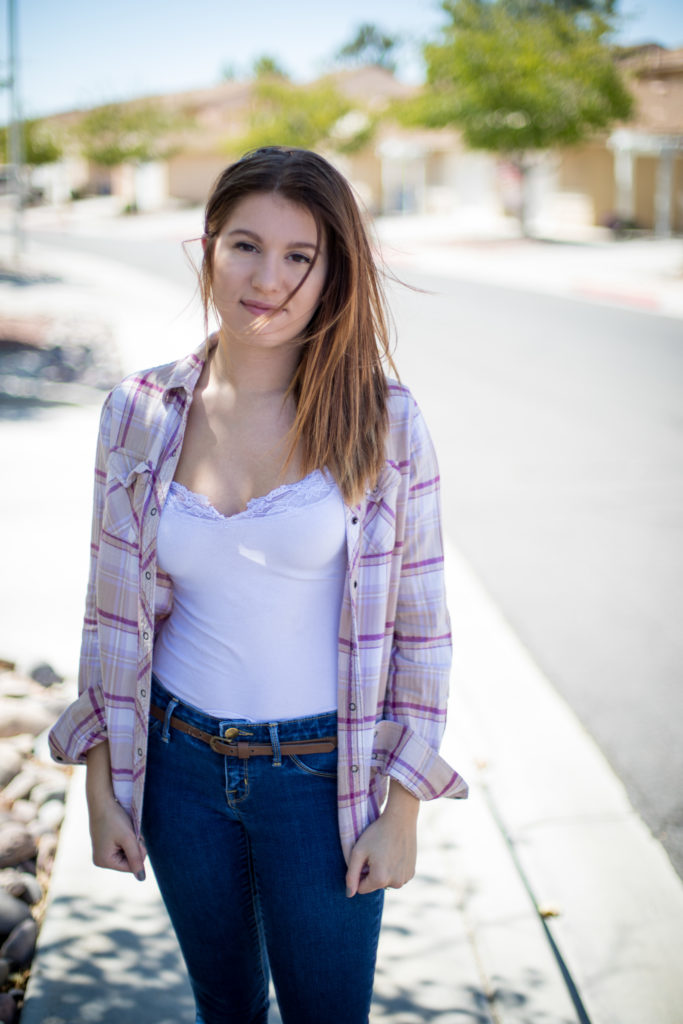
Aperture of F2.2 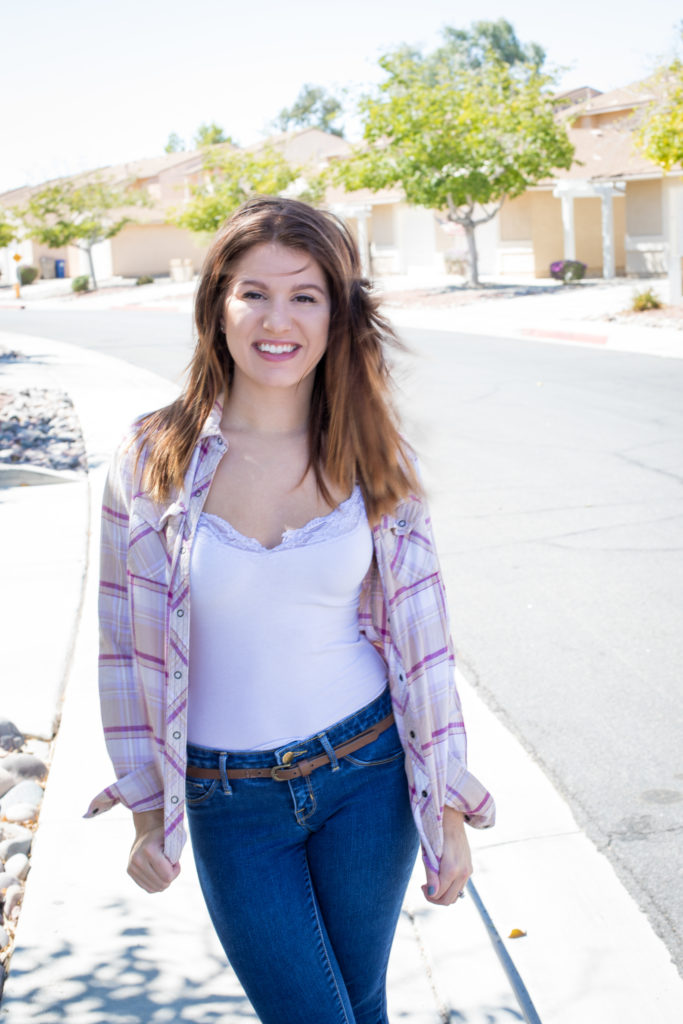
Aperture of F14
On the left, we have the subject in focus but the background is completely blurred out. In the right image, the subject is still in focus, but the background is much more clear and distinct. This is because the left image has a low aperture of F2.2 (shallow depth of field) and the right image has a high aperture of F14 (high depth of field).
There is a technical science on how this effect is created and trust me I could talk about it forever. It has to do with how wide the shutter opens. But for the purposes of this article you need to know this:
A lower aperture means a blurry background. A higher aperture means a much clearer background.
So how can you apply this to your photography? I’m so glad you asked! When you are taking portraits and close ups of a subject, use lower apertures to create that dreamy effect. You’ll want to use higher apertures for landscape photography, architectural photography, and sometimes sport photography to keep that full image in focus.
Your Homework:
Take look at that camera setting dial and find the “Av” setting. Av stands for Aperture value. Spend some time taking photos with the the lowest aperture setting as well as the highest setting and then show me what you come up with! If you get brave, try flipping over to the “M” setting and seeing how you can adjust both settings to work together but don’t forget we’re still missing a piece of the puzzle. Here’s a hint, it’s called ISO and it’s the third and final installation of this super-mini series! Check it out HERE!