Ok guys, it’s time for the final installment of our super-mini series “Basics Made Simple” where we take the 3 key elements of a photograph, break them down into SUPER simple terms and then send you out in the world to create beautiful photos.
I hope you’ve already walked through our previous posts on Shutter Speed and Aperture. If not, be sure to go do that first because they are the two biggest settings to master and I really feel that a good foundation in these two set us up for success with this last piece of the puzzle.
Now if you have been playing around with shutter speed and aperture, I’m so proud of you! But did you get brave enough to try the camera in full manual yet? Well it’s time. I want you to take out your cameras and switch that dial to the “M” setting and let’s finish this! Spend a few minutes photographing an object. While doing this, try different combos of aperture and shutter speeds and take a good look at the difference in the photos. Some pictures may be super dark, some may be super bright. THAT’S OK! We are about to fix this.
But first, you need to understand why this is happening. Remember how in the shutter speed post I mentioned a faster shutter speed means less light gets into the camera? And in the aperture post, I mentioned how a higher aperture means the shutter opens a smaller diameter (and less light gets into the camera)? You have to learn how to balance the two settings to get the visual effect you want. In many cases reducing shutter speed as you increase the aperture will counter that light loss and create an even photo. But in those moments where you need a really high aperture to capture a fast moving subject, we introduce our final setting: ISO!
To be honest, I don’t think anybody knows what ISO stands for anymore. It’s a term the dates back to the film ages. However, ISO is the term used to describe how sensitive you camera sensor is to light. For example, say you’re taking a photo at dusk. The sun is going down, it’s starting to get dark, but you still need that high shutter (and high aperture) to catch that perfect sport photo. Use the ISO setting to increase light sensitivity and therefore get a brighter image. Here’s the takeaway:
“As your photos get darker, increase your ISO.”
Here are some instances where you’d need varying ISO settings. If you are shooting in the heat of the day, the sun is bright, and you’re in the desert where light reflects off of everything, use the lowest ISO settings. On the flipside, if you’re at a carnival at night, trying to catch the cool lights and people eating corndogs, use a higher ISO setting. It’s as simple as that. Figure out what your ideal ISO is (here’s a hint, keep as low as you can), set it and then play with shutter speed and aperture the rest of time.
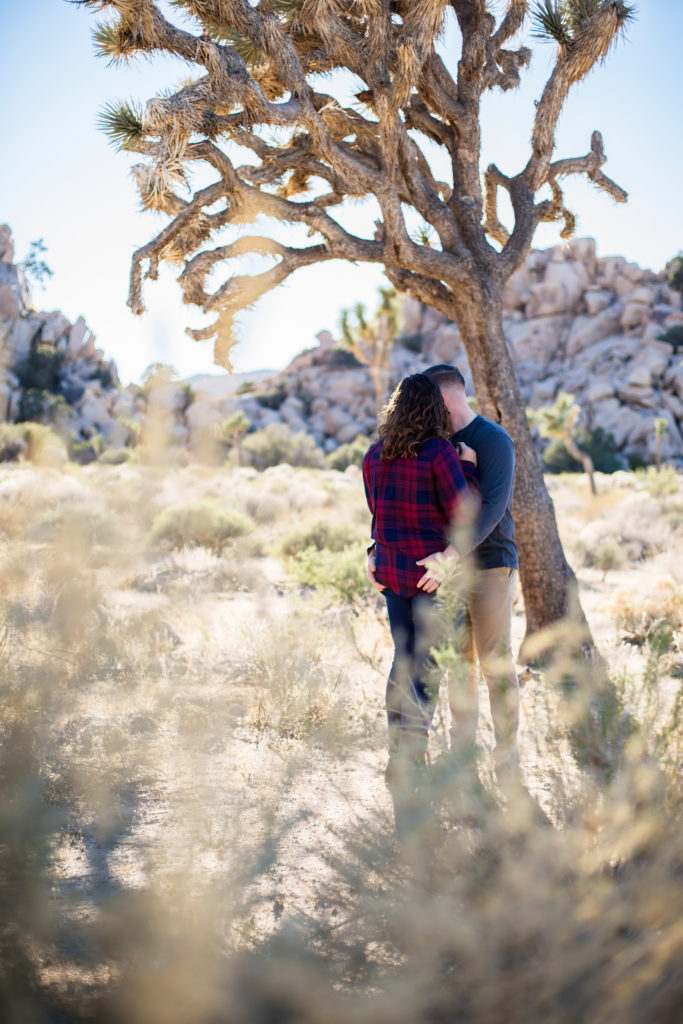
Use lower ISOs in situations where there is lots of light. 
Use Higer ISOs at dusk and low light situations
Here’s just a tidbit of a warning though, as you increase your ISO, you will start to see “Noise” in your images. This refers to those tiny speckles of color you see in dark photographs. As long as you can keep your ISO below 1600, 3200 at the highest, you shouldn’t have to worry too much about this. Just rule of thumb is that a lower ISO is better.
That’s it, we’ve covered the big three settings that make up a photograph. Of course there are more settings to play with and I’ll be covering them at some point here in the blog but mastering these foundations will get a mile ahead of everyone else trying figure photography. The true art comes in when you know exactly how to mix the three settings to create a truly stunning image. They won’t all turn out perfect but I promise the more you practice and get familiar with this, the better your photography will get.
YOUR HOMEWORK:
Get out there, start shooting in only manual mode and don’t look back at that auto setting. EVER! And be sure to post your beautiful images below. I want to see what you come up with!!!